

|
|
ABS Removal |
||
|
This article is now being maintained on HowTune.com: Removing The ABS Brakes on a GMC Syclone
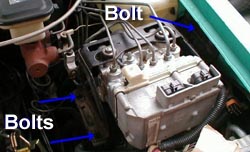
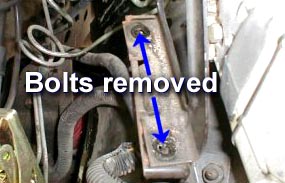
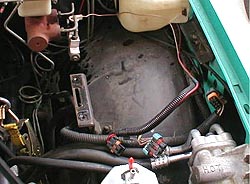
Purpose: This "modification" will remove the ABS unit from your truck. This will get rid of unwanted weight and stop that pesky ABS light from coming on. Preface: This procedure will remove your ABS and will affect your wet stopping ability. You probably will not notice a difference on dry pavement. Most people remove the ABS 1) to clean up the engine compartment and 2) because they're interested in drag racing and don't drive the truck much around town. Editor's Note: Perform this modification at your own risk! Be aware that lawyers will be very interested in how you went out of your way to disable a safety system on your vehicle if you are ever involved in an accident! Nuff said - We're all adults, and as such, we take responsibility for our own actions, right? Before you start into this uninstall, be sure you know how to use all of your shop equipment. Take your time and be careful. You are modifying your braking system and it should be done with care. If you're not comfortable with this procedure then have someone else perform it for you. 1. Open the hood of your truck and look in the front Right of the engine compartment. Locate the ABS Unit. Remove the 3- 1/2" bolts that mount it.
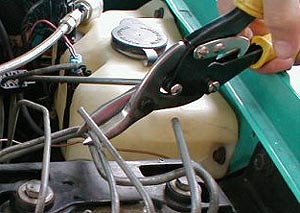
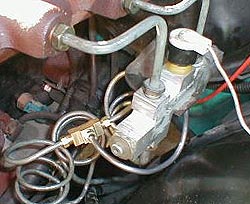
2. Cut or remove the brake lines from the ABS Unit. We only used tin snips in this area since a perfect cut wasn't necessary.
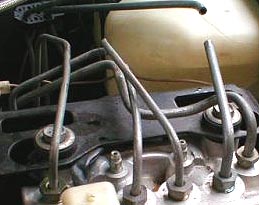
3. You can see that the engine compartment is already looking more empty. This Typhoon also has the cruise control removed for extra cleanliness.
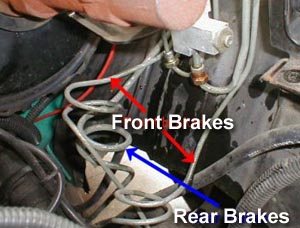
4. The front brake lines (see the <FONT COLOR=#ff0000>red</FONT> arrows) have to be joined. The rear line (see the <FONT COLOR=#0000ff>blue </FONT>arrow ) just needs to be rerouted.
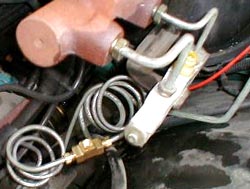
5. Cut the rear line, slide on the nut, then double flare the lines with your flaring tool. Then join the two front lines with a 1/4" Tee.
6.
Connecting the Front lines: Using the new brake line you purchased, measure
and cut it to a length that you think will make it to the combination valve, then
bend it to the best fit. Keep the nut on one end and either reuse the original
nut or put a new one the line and double flare it.
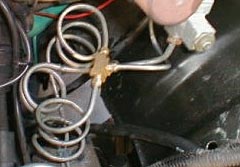
7. After you're all done it should look something like this.
Comments: You will have to bleed the brakes when you are finished with the removal. Refer to your service manual on the proper way to bleed them.
|
||