|
I'll quickly touch on the plus and minuses of an external gate.
The stock setup: integral wastegate controlled by the ecu. This is the safest
setup under normal trim with well a functioning wastegate.
The exhaust side of the stock turbo is extremely limited. There are high pressures
in the exhaust housing and the wastegate hole/puck is dramatically undersized.
Boost creep on opened exhausts is common, inconsistent boost control is common,
and its unusual to see a strait boost curve on a stock truck.
An external gate at the performance level of the innovative pro gate we installed
flows considerably better and will effectively control boost at a pre determined
level.
The gate will open later, and be able to control high boost effectively. It has
the ability to vent enough exhaust to make up for much larger then stock turbos.
On the downside: when the gate is open, its loud. Its not an awful sound, but
it will turn some away.
Boost is no longer directly ecm controlled. If your knocking, the ecm cant tell
the wastegate to open.
PTE offers a great integral design, and if you desire to go the PTE route, You
will most likely opt not to buy an external because it has no benefits over
the pte gate.
What you need:
Wastegate
Exhaust cross-over tube (welds to the drivers side)
Pressure regulator
vacuum hose
fittings for the wastegate
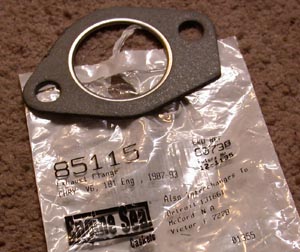
exhaust gasket (we used autozone "Engine Seal" 85115 Exhaust Flange
for 87-93 CHRY V6 181 Engine)
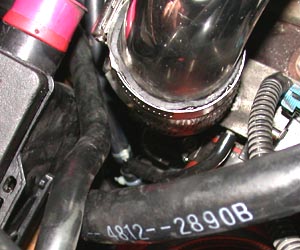
Installation of the wastegate
Drain and remove the lower IC core.
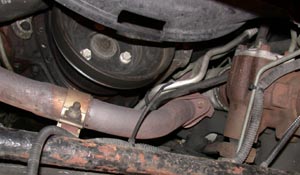
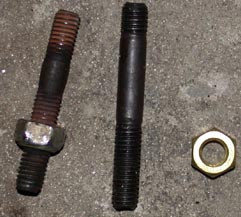
Loosen the 4 nuts on each end flange of the cross over tube. If you break any
of the studs like we did. A suitable replacement can be found at most automotive
stores.
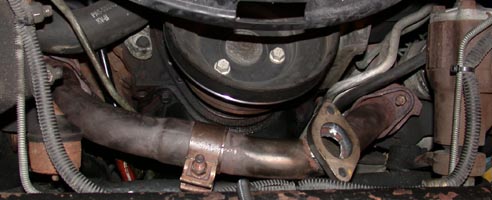
Remove the cross over tube and place aside.
If have a new crossover w/wastegate flange welded, you can continue install,
otherwise, ship your crossover to mike at armotorsports, and he'll weld on the
appropriate flange, and ship you your new wastegate.
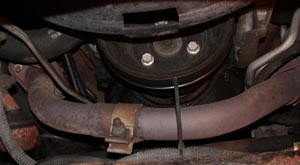
Now, bolt the new crossover with flange into place. If the center was apart,
leave it loose until its back in place.
screw on all 4 nuts, and slowly tighten each switching often as to not over
tighten an individual.
Screw in the vacuum fittings to the wastegate. We used strait fittings on both
ports.
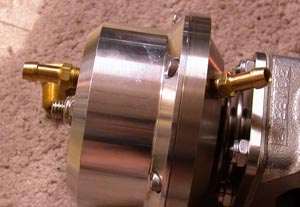
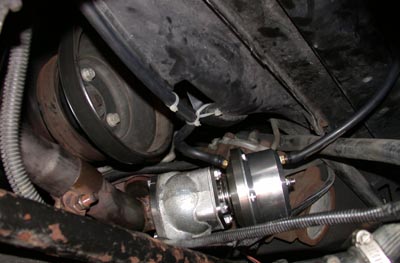
Now insert your gasket and bolt on the wastegate. The open port faces to the
drivers side toward the steering box.
Tighten the wastegate on and attach your turndown should you have one. Ours
didn't quite fit, so we are thinking about using flexi-exhaust pipe to route
away the exhaust. Although, it hasn't melted anything but grease as of yet.
Now installing your vacuum hoses. The stock boost controller is out of the loop
now, disconnect it. Remove it if you'd like.
The boost port from the turbo will go into a vacuum T. one side going to the
bottom of the wastegate, the other going to the regulator valve, and then into
the top of the wastegate.
Mount the valve where you want and zip tie all connections.
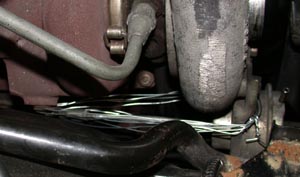
Now to deal with the old wastegate. You have several options. 1: shorten the
rod as much as possible 2: shorten and wire the arm shut. 3: weld the puck shut
Your aim is now to prevent the stock wastegate from being pushed open by exhaust
pressures, wrapping wire will keep it from opening, but looks pretty awful.
Just adjusting the rod may allow for some movement still. And of course, welding
is quite a bit more permanent then either.
We simply wrapped some wire on ours.
Re install the IC and you should be ready to test.
Make sure your regulator is all the way open (allowing pressure past the valve)
Once warmed up, make a quick throttle blast to verify the wg is opening at a
desired base level. If it doesn't open and continues to build boost, try adjusting
your regulator to the opposite position and double check your vacuum lines.
At base, you should hear the wastegate begin to open around 5-6 psi and hold
solid around 10.
Now to tune to a desired level, slowly adjust the bleeder watching your boost
levels.
Every time we adjusted, we backed the valve out all the way again to count the
turns.
Make adjustments in 1/4 turns until your close to your goal. It will most likely
take 1 1/2 turns to start making changes to the boost level.
Nows the time to get the truck on a laptop diagnostic tool and start tuning
for your new solid boost line.
|