


|
|
IC Hose And Pump |
||
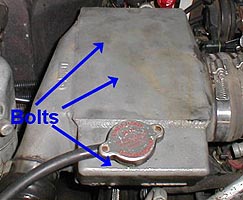
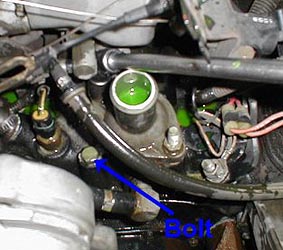
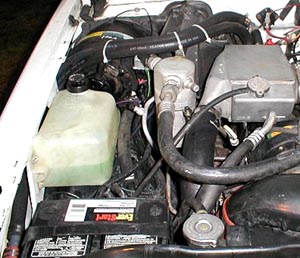
Purpose: This modification will upgrade your intercooler pump and get rid of the metal I/C lines from under the hood. The stock I/C pump is inefficient and most of the time fails after the years, so replacing it with a newer pump that flows more is beneficial. The stock metal I/C lines run right on top of the engine and intake, soaking up as much heat as possible. This is a bad thing and replacing them with rubber heater hose and rerouting them away from heat is a good idea. Plus, if you need to remove the intercooler for some reason it's a lot easier. Preface: There are different types of pumps out there that can be used. We used a Shurflo in this install but there are others that will work. Before you start into this install, be sure you know how to use all of your shop equipment. Take your time and be careful. You are modifying your intercooling system and it should be done with care. If you're not comfortable with this procedure then have someone else perform it for you. 1. Drain the water from the intercooler via the petcock on the lower left corner of the heat exchanger. 2. Open the hood of your truck and look in the front left of the engine compartment. Locate the Intercooler. Remove the 3 - 15mm bolts that mount it with the 24" 3/8th's extension, swivel adapter and 15mm socket. The bolts are under the intercooler about where the arrows are pointing. (see the <FONT color=#0000ff>blue</FONT> arrows in Figure 2). Loosen the clamps on the I/C to Throttle Body hose, and loosen the clamps on the turbo to I/C hose. Remove the intercooler. Figure 2
3. Remove the rubber hoses from the metal lines at the back of the Intercooler. Figure 3
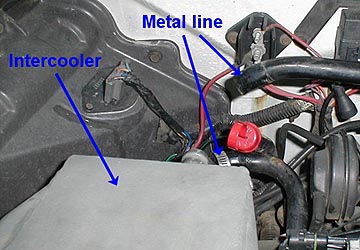
4. Remove the rubber hose from the other end of the metal lines. (see the <FONT color=#0000ff>blue</FONT> arrows in Figure 4). Remove the 10mm nut and bolt that hold the metal line in. (see the <FONT color=#ff0000>red</FONT> arrow in Figure 4). Figure 4
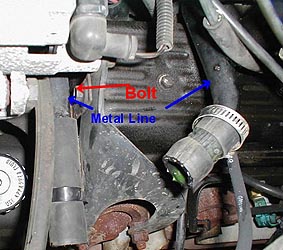
5. Remove the 10mm bolt that is hidden on the MAP sensor bracket. (see the <FONT color=#0000ff>blue</FONT> arrow in Figure 5) Figure 5
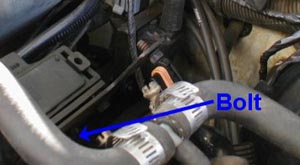
6. Remove the 14mm bolt from the intake. (see the <FONT color=#0000ff>blue</FONT> arrow in Figure 6) Figure 6
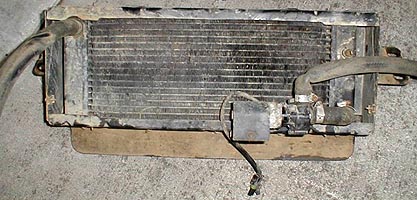
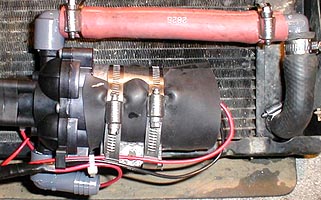
7. Remove the lines. It can be done. It will take some time and patience but they come out in one piece. 8. There are 4 15mm bolts that hold the heat exchanger in place. Remove them, disconnect the pump connector and the low I/C coolant level sensor wire. You should have something like Figure 8a Figure 8a
Figure 8b - closer view of pump
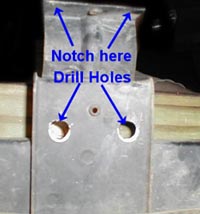
9. Remove the pump from the heat exchanger. We kept the new Shurflo pump held in place with hose clamps, so you'll have to drill 2 - 3/8" size holes in the bracket <FONT color=#ff0000>(place a piece of wood behind the bracket so you don't damage the exchanger by accident.) </FONT>(see the <FONT color=#0000ff>blue</FONT> arrow in Figure 9) <FONT color=#ff0000> </FONT> Then notch the upper part of the bracket so the hose clamps have something to sit into. (see the other <FONT color=#0000ff>blue</FONT> arrow in Figure 6) Figure 9
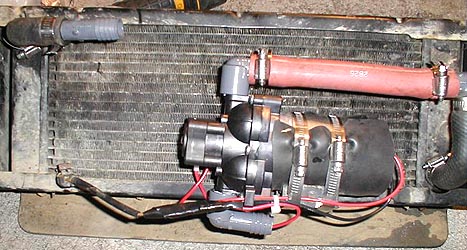
10. Install the plastic 90's onto the pump, use some Teflon tape to help it seal, and point them toward the passenger side of the truck. Cut the piece of rubber so that it covers the pump, this will help quite it down, open the clamps up all the way and fish them through the drilled hole and inside the notches in the bracket. If still in OK condition, you can reuse the original rubber 90' hoses from the intercooler and heat exchanger. Refer to figure 10a and 10b for installation of the hoses. Cut the original pump connector off and reuse it for the new pump, red to brown and black to black. Figure 10a
Figure 10b
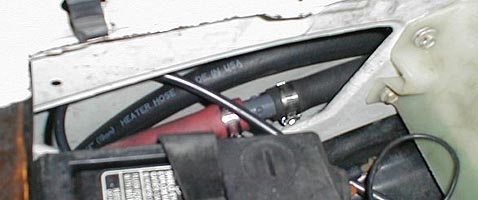
11. Route the hose's between the frame an body and then into the fender. We had to connect 2 pieces of hose together since we couldn't get a continuous length of hose long enough. Figure 11 shows the hose routed through the fender. Figure 11
12. Here's the hose coming from the fender and to the Intercooler. (See figure 12) Figure 12
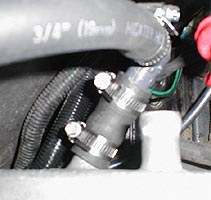
13. Use a plastic 90 and a small piece of hose to connect the hose to the Intercooler.
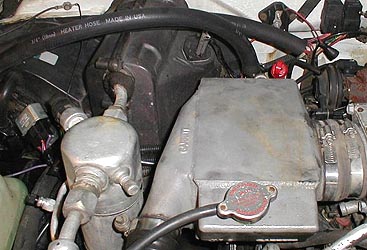
14. The finished product should look something like Figure 14. We choose to go over the A/C and not under it so that in the event that the Intercooler has to come off again it can be easily placed out of the way. Figure 14
Comments: This job can be a lot of work, but with good planning and all the parts it can be made simple. Replacing the I/C pump and lines is one of the most important upgrades you can do for a SyTy, as it will drop intake temps dramatically. |
||