


|
|
Window Seals |
|
The sound of air whistling in the cab at highway speeds finally became a big enough irritant to get me to do something about it (A sign that the truck is finally running pretty good, otherwise!). I ordered a replacement window seal from JC Whitney, catalog item number 07LW5846U for the driver's side seal, at a cost of $39.95 Tools you'll need:
Start with the window down just above the half way point. This should allow access to the bottom window guide later on without futher adjustment. First step is to remove the plastic trim panel at the top trailing edge of the door, secured with 3 screws. Next remove the 2 screws that secure the arm rest.
Now you're ready to remove the door panel. I used a long flathead screwdriver to gain access behind the panel, then a door panel removal tool to pop the plastic panel rivets from their mounts. There are a total of 8 plastic rivets.
With all the plastic rivets separated, you must next separate the electrical connector to the power window switches to free the panel. I used a plastic (non-conducting) wedge to separate the two sides of the connector without damaging them.
The panel can now be removed by lifting it up off the top hinge of the door. Next remove the inner panel soundproofing foam by removing the 2 10mm bolts on the arm rest, along with 2 additional plastic pop rivets and outer edge adhesive.
Now remove the trim along the top window opening. It's held on with 5 metal tabs, which will release when pulled toward the inside of the door and then up. I have aftermarket rear view mirrors on my truck, and found that I had to loosen the bottom bolt to slip out the trim from underneath the mirror molding. Not sure if this is necessary on the stock "elephant ears". Be careful not to bend the trim excessively during removal. It's metal and creases may be permanent!
Removing the old window seal begins with removing the screws that secure the 2 seal brackets in place to the door. There are 2 screws in the bracket at the trailing edge of the door, and just a single screw on the leading edge bracket.
The window has to be lowered to remove the old seal and to reinstall the new one. Remove the 2 10mm bolts that secure the bottom plastic window guide, holding the window up to prevent it from crashing down after the second bolt is removed. The plastic guide will now separate from the metal bracket behind it and can be removed. Lower the window down as far as it will go - There's a 2 inch riser that will prevent the window from going all the way to the bottom of the inner door - That's ok.
With the window lowered and resting within the door, you can now start pulling out the old window seal. Start at the top trailing edge at the formed 90 degree corner - It has the most rubber "meat" to get a grip on and start yanking the top out. Then pull up on the trailing and leading edges until they clear the window channels.
With the old seal removed, you may now remove the 2 metal brackets by straightening the tabs that secure it to the seal.
Install the old guides into the new window seal, aligning the scew mounts with the openings in the seal. Use the awl to start a hole for each of the retaining tabs, then press the tabs into the seal and bend them over to secure the brackets to the seal. Install the new seal into the door channels, bolt the bottom window guide back on, and reassemble the remainder of the door. You may have to use some duct tape or similar to reseal the foam soundproofing if the adhesive is no longer sealing. Apply some dielectric grease to the power window connector if available. Enjoy the quite ride!
|

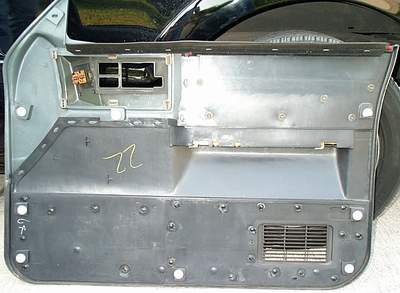 Location of the 8 panel rivets.
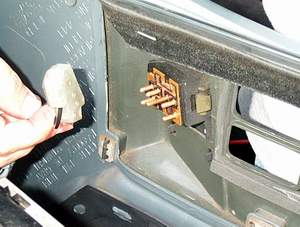 Power window
connector removed.
Power window
connector removed. Foam soundproofing
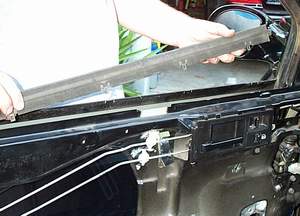 Top trim
removal.
Top trim
removal.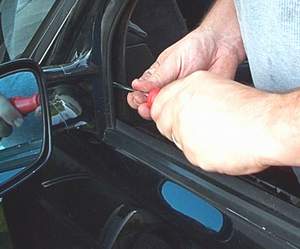 Leading edge
bracket screw removal.
Leading edge
bracket screw removal.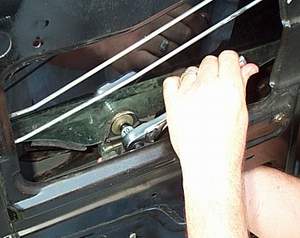 Bottom window guide
removal, securing the glass with other hand.
Bottom window guide
removal, securing the glass with other hand.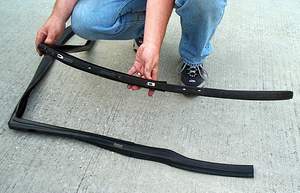 Old seal on
top, with brackets still inside.
Old seal on
top, with brackets still inside. 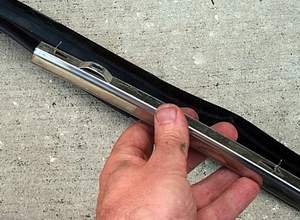 Bracket removed
from seal, revealing retainer tabs and scew mount.
Bracket removed
from seal, revealing retainer tabs and scew mount.